HOWTO: Create a ZFS Filesystem OS X Leopard
You've upgraded to OS X Leopard, played with Time Machine, tweaked things to your heart's content and now you want to play with something else cool you've heard has made it's way into OS X - ZFS.
Unfortunately, Apple have only bundled read-only support for ZFS to date, but we'll be changing that.
Right, now we've got the warning out of the way, lets get cracking.
Get and Install read-write ZFS support
First, you need to get hold of the ZFS Beta Seed pkg from the ADC. If you don't have an ADC login, you can register for free.
Due to an unfortunate bug in the packaging, you won't be able to install the ZFS Beta Seed pkg by simply double clicking the pkg if you're running 10.5.1. This bug doesn't affect 10.5.
There are several ways to resolve this, but I like the one detailed by Shawn Ferry the best:
- Mount the DMG you downloaded from the ADC site
- Open up the terminal (we'll be spending a lot of time here)
- Expand the pkg in the DMG:
$ pkgutil --expand /Volumes/ZFS/ZFSBetaSeed1.pkg /tmp/ZFSseed1 - Edit the Distribution file and remove the check that is getting things wrong by commenting out the following line:
<volume-check script='volumeCheck()'/>
... by wrapping it in
<!--and-->so it looks like this:<!-- <volume-check script='volumeCheck()'/> -->
... and save the file.
- Now re-package the files we've extracted and edited into a new pkg:
$ pkgutil --flatten /tmp/ZFSseed1 /tmp/ZFSrw.pkg - Open the package installer and install the new pkg as you would normally:
$ open /tmp/ZFSrw.pkg - Reboot for the changes to take effect
Create Your First ZFS Filesystem
Now we've got read-write ZFS support installed, we can create our first ZFS filesystem. In this example, I'm going to use a USB memory stick, but you can use any free partition, or even files (drop me a line if you want to know how to do this with files).
- Ensure the device(s) you are going to use are connected and powered on.
- If these devices already have filesystems like FAT or HFS+, OS X will mount them automatically. Unmount, but don't eject them by opening up Disk Utility, select the device and click the "Unmount" button.
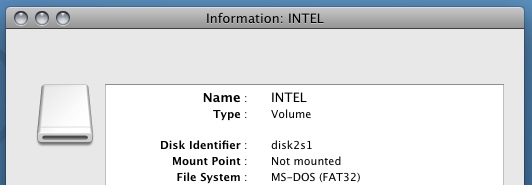
- Whilst you've got Disk Utility open, right click on the device(s), select "Information" and take note of the "Disk Identifier":

- Fire up the terminal and create your ZFS zpool and first filesystem (enter your password when prompted):
$ sudo zpool createdisk#s# ... where
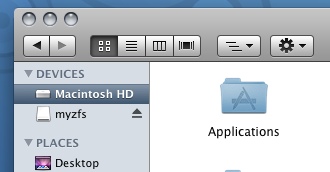
<new zfs name />is any name you want anddisk#s#is the "Disk Identifier" you noted above. In my examples I use "myzfs" and "disk2s1" respectively.After a short wait you'll find you now have a new device created and mounted in the finder too:

This is the zpool we've just created. It will have a ZFS filesystem on it too.
That's it folks. You now have a ZFS filesystem that you can use as you would a normal filesystem. You can confirm this as follows:
$ sudo zpool list

NAME SIZE USED AVAIL CAP HEALTH ALTROOT

myzfs 976M 259K 976M 0% ONLINE -

$

$ sudo zpool status

pool: myzfs

state: ONLINE

scrub: none requested

config:
 NAME STATE READ WRITE CKSUM

myzfs ONLINE 0 0 0

disk2s1 ONLINE 0 0 0
errors: No known data errors

$

$ sudo zfs list

NAME USED AVAIL REFER MOUNTPOINT

myzfs 356K 944M 268K /Volumes/myzfs

$

$ mount

/dev/disk0s3 on / (hfs, NFS exported, local, journaled)

devfs on /dev (devfs, local)

fdesc on /dev (fdesc, union)

map -hosts on /net (autofs, automounted)

map auto_home on /home (autofs, automounted)

myzfs on /Volumes/myzfs (zfs, local)

$
Time to Play
You can now play with things to your heart's content. For example, you can create a new ZFS filesystem on this pool:
$ sudo zfs create myzfs/data

$ sudo zfs list

NAME USED AVAIL REFER MOUNTPOINT

myzfs 380K 944M 268K /Volumes/myzfs

myzfs/data 18K 944M 18K /Volumes/myzfs/data

$
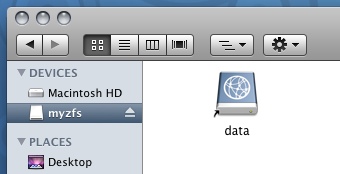
And you'll find Finder shows it too:

You can find more about what you can do with ZFS in my ZFS Cheatsheet, just note it's based on the functionality available in OpenSolaris. OS X may not have all this functionality yet.
Be Careful
Now for the important part: right at the beginning, I said ZFS WILL crash your Mac. I wasn't joking. Just remove the device you have been using, try access it in Finder and see what I mean.
Unfortunately OS X isn't too good at detecting missing devices under ZFS control yet, so it panics your system. You can prevent this by ensuring you export your ZFS filesystem BEFORE you attempt to disconnect your devices using:
$ sudo zpool export -f myzfsDon't just eject the the filesystem from Finder as this doesn't change the ZFS metadata for the device (yet).
If you want to use your device again in the furture, connect it, unmount the device in Disk Utility as above, open the terminal and import the filesystem:
$ sudo zpool import myzfsYou'll now have your ZFS filesystems as you left them.
Now at this point you may be wondering what the fuss is all about, you can do this with HFS+ or FAT anyway. I agree you can, but the true power of ZFS comes to life when you have lots of disks, or you want to setup some sort of redundancy using RAID. This is very easy with ZFS and you'll be safe in the knowledge that your data is safe.